Prerequisites
In this article you'll learn:
Like most nodes, the Google Sheets node is divided into two main areas. The larger area on the left is for writing your query and configuring the node and the Preview box on the right lets you test the node with test input data and shows you what the node returns.
First, let's look at the config area on the left.
If you haven't done so, create a Google Sheets data source in FactBranch.
In the Google Sheets node, select the "Authentication" tab and select the data source you've just created.
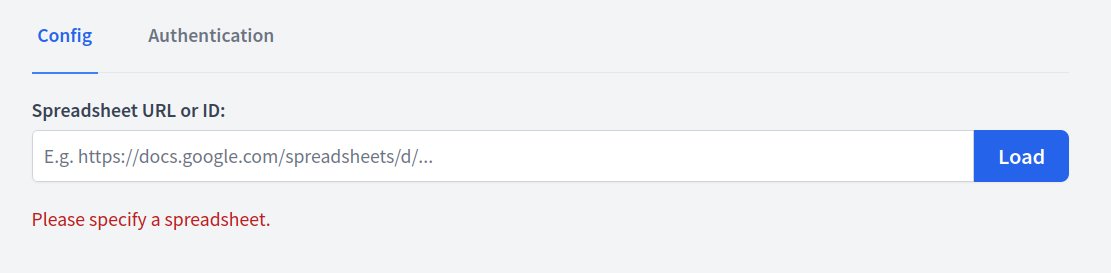
Return to the Config panel on the left. Copy/paste the Link to your Google Sheets spreadsheet here and click Load.
Next, select the sheet you'd like to use as your data source and click Use sheet.

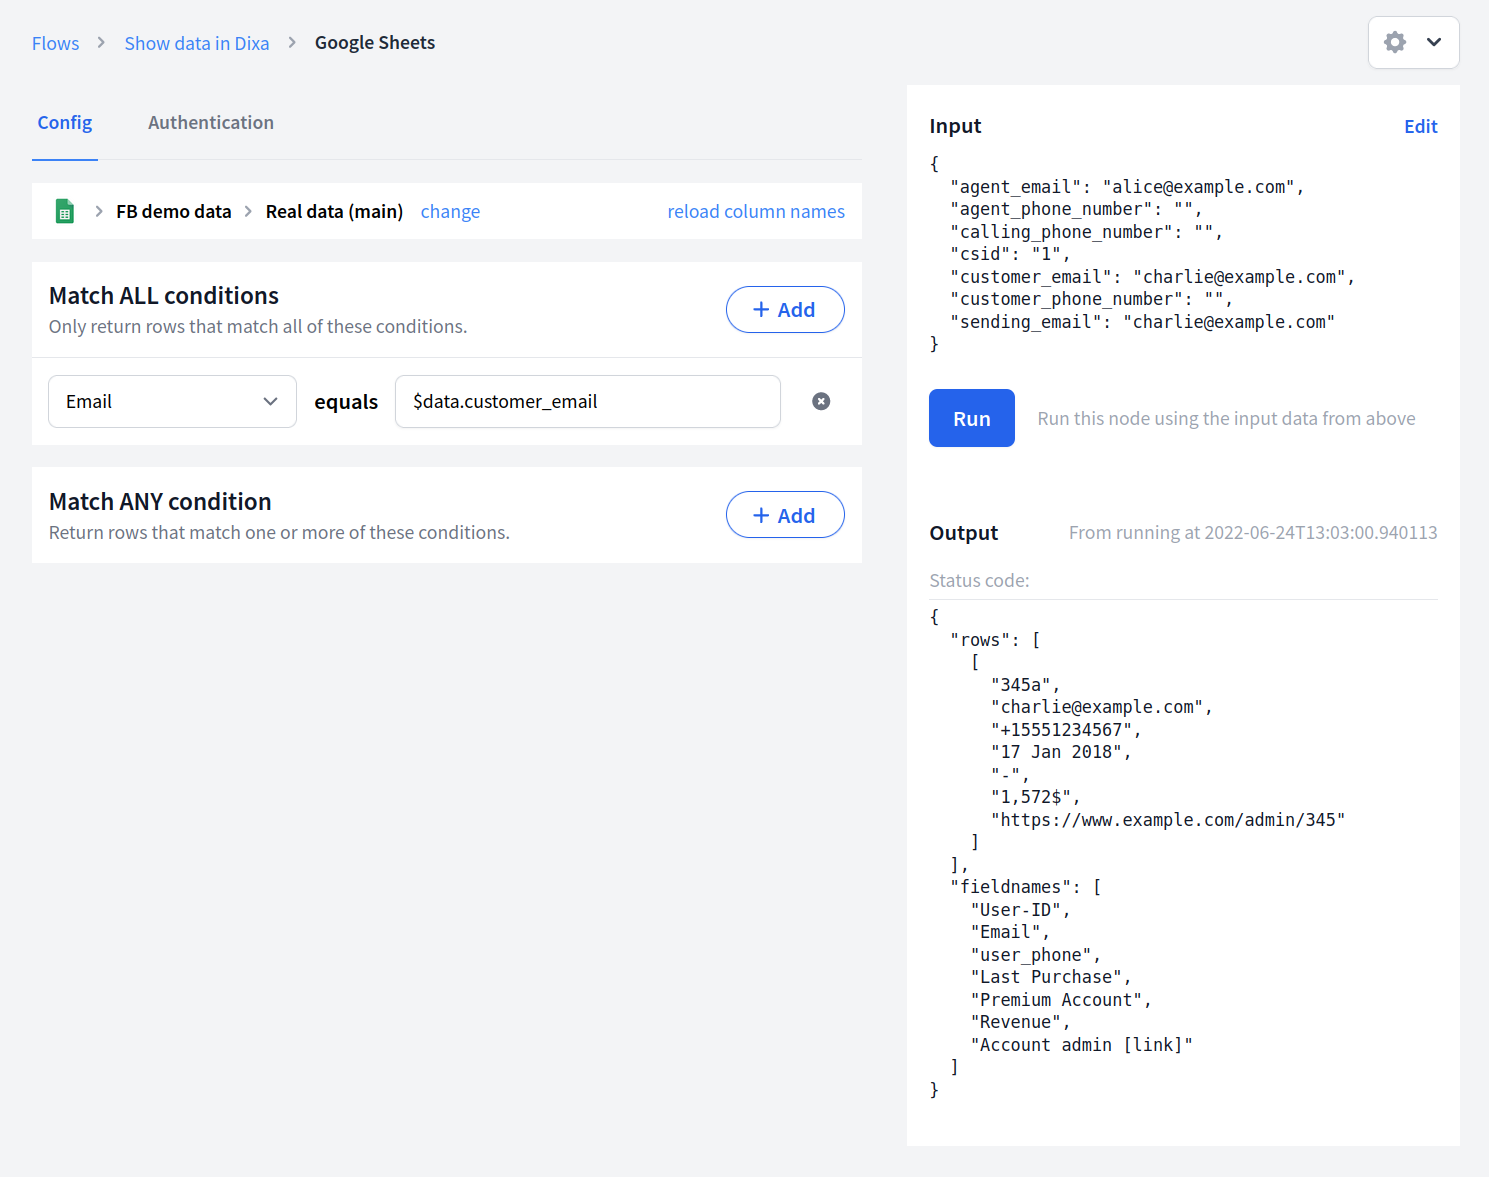
If you want to search for values in your spreadsheet, you can use two different sets of filters.
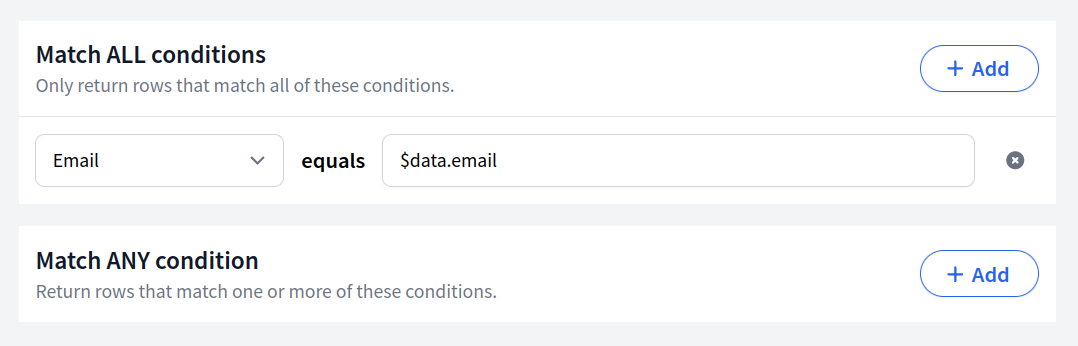
The first (Match ALL conditions) will match the row against all the conditions you specify and only return rows that match every condition.
The second option (Match ANY condition) will return all rows that match at least one of the conditions you specify here.
In the value fields you can use placeholders to dynamically fill in data. In the example above the node will only return rows that match the email from the input data.
Most nodes use dynamic data somewhere (more on using placeholders for dynamic data in the next section below) and so it's essential to try out your node with input data.
The Input data is just valid JSON and you can edit is as you like. However, you want to simulate the data this node would receive from its previous node (or from the trigger, if this is the first node).
So, ideally you would first capture a real request to the trigger, use it as test output data and then inherit the output data as the input data of the next node.
To inherit the test outputs from the previous node, click Edit next to the Input data title and then hit inherit outputs from previous node. Your test input will update with the outputs of the previous node or trigger.
Placeholders beginn with a dollar-sign ($) just like variables in many programming languages.
The input data to this node are stored in the $data variable. Let's say your
node receives the following data:
{
  "id": 123,
  "email": "alice@example.com",
  "phone_number": "+1234567890",
  "name": "Alice"
}
If you want all rows that either match the email address or the phone number, you would define the following filter:
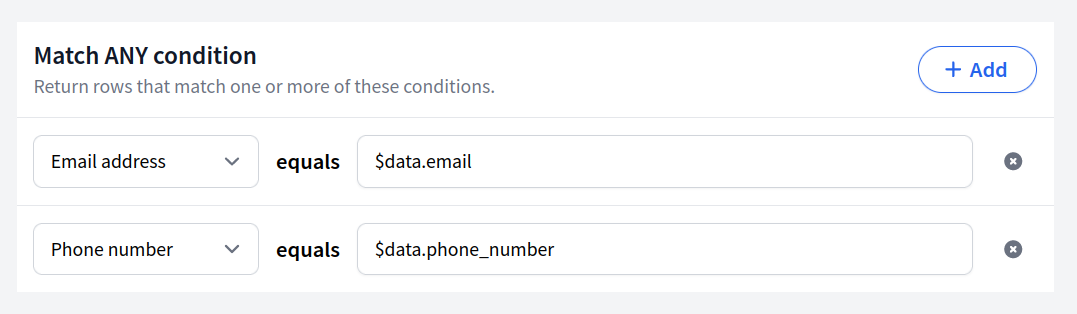
The values for email and phone_number will be replaced when the node is run.
If you need to use the dollar-sign ($) somewhere in your filter other than in a
placeholder, please use the escaped version which is two dollar-signs ($$).
To see how your filters work with the test input data and your spreadsheet, hit the Run button. This will run the node (but only this single node) for real.
In the test run it will replace all placeholders with the data you've defined in Input data. After the request finishes, you'll see the outputs in the Output section and you can work with this data in the next node.
If this is already the final node in the Flow, this output will be returned as the Flow's results.
To rename the node, either click on Rename next to the title, or double-click on the title itself. Then enter the new name and click on Save or hit Enter on your keyboard. To revert to the old name, hit the Escape key.
Above the Input box you find the quick navigation through the Flow. Use this to get to the previous or the next node.